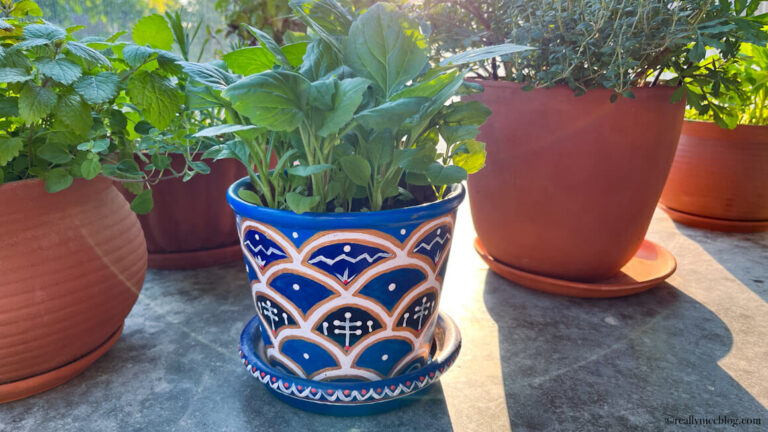
Terracotta pots look beautiful with plants and easily fit various interior styles. However, if you are looking for ways to add a splash of color to your surroundings, try painting terracotta pots. This step by step guide will help you learn how to paint terracotta pots using acrylics and seal them to ensure longevity.

Supplies for Painting Terracotta Pots
- Terracotta pots with saucers
- A pencil for sketching and drawing designs
- Acrylic craft paint in colors of your choice
- Paint brushes or foam brushes in different sizes
- Something to cover and protect your desk (old newspapers, cardboard, etc.)
- A small jar of water, paper towels, a palette for mixing colors
- Other art supplies based on your design, e.g. painter’s tape
- Clay pot sealer or acrylic varnish for painted sealing terracotta pots
How to Paint and Seal Terracotta Pots
#1 Clean Terracotta Pots
Whether you are working with new or old terracotta pots, the first thing you want to do is clean them up. This step ensures optimal paint adhesion. The cleaner the surface, the better the paint will adhere, the longer they will last on your terracotta pots and saucers.
How to clean terracotta pots and saucers? Wash them as you would do the dishes. Use warm water, soap, sponge and cleaning brush if needed. For stubborn dirt or sticky price tags, a soak in hot water followed by diligent scrubbing should do the trick.
Once washed, allow the pots and saucers to air dry completely. Placing them in a sunny spot can help expedite the drying process.
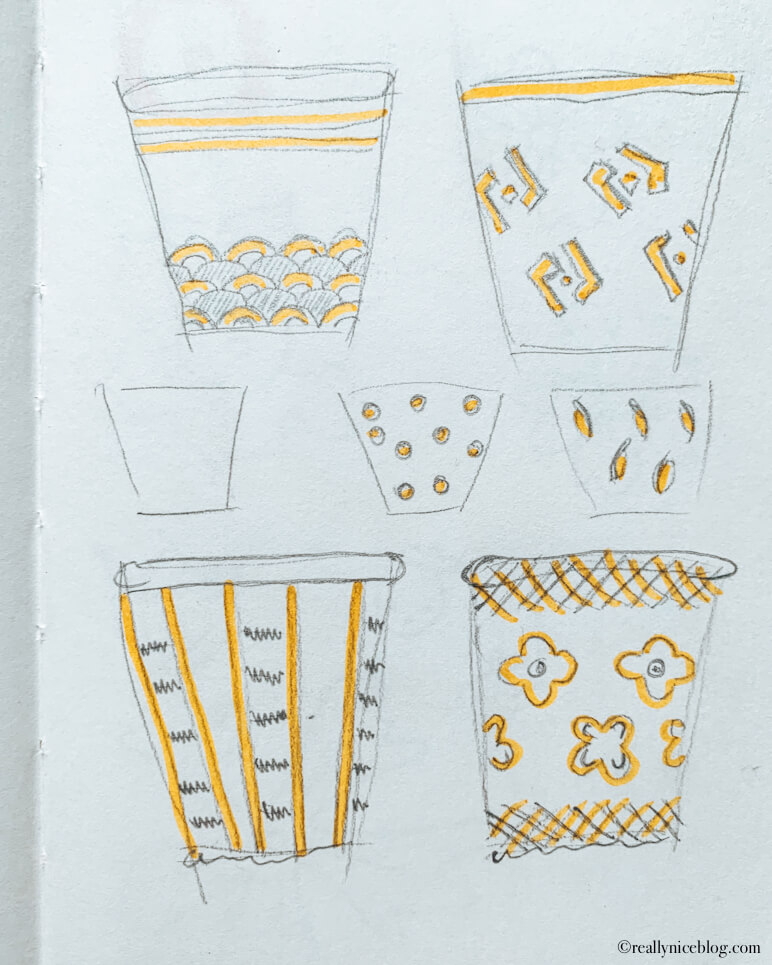
#2 Sketch Terracotta Pot Designs
While your terracotta pots are in the drying process, take this opportunity to brainstorm design ideas. Sketching your own terracotta pot design or finding a reference that captures your vision will make the next step smoother. Painting will be easier simply because you will know what you want to paint. Moreover, this step helps to determine the colors to be used and the necessary painting tools such as brushes or painter’s tape. Additionally, if you plan to paint multiple terracotta pots, sketching beforehand ensures consistency. Think of it as your own terracotta pot collection.
When sketching your design, it can be as simple as you like, and there is no need to finalize every detail from the start. You can gradually enhance your initial sketch as you paint, adding details along the way. Once you have your design in mind or on paper, use a pencil to lightly draw it on the surface of the terracotta pot.
Lastly, if you prefer to embrace improvisation while painting on terracotta pots, feel free to skip this step and let your artistic instincts guide you.
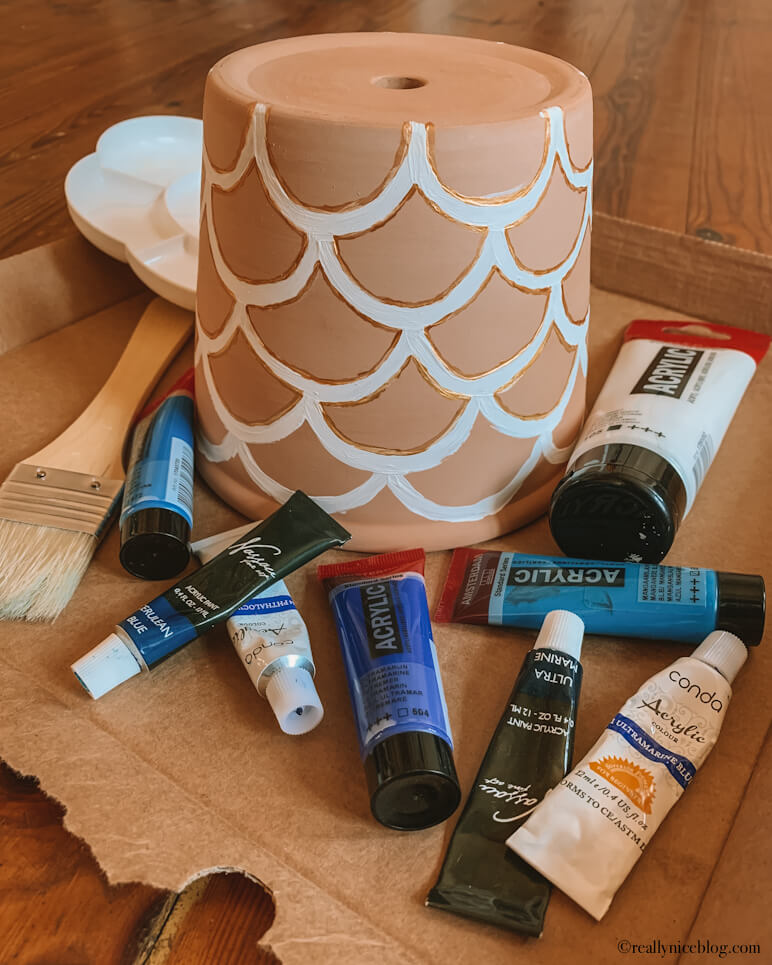
#3 Set Up the Workspace
Select a suitable workspace based on the number of terracotta pots you intend to paint. Keep in mind that working on a larger batch will require more time, so you may want to ensure your workspace remains set up for multiple days.
Once you have determined your workspace, safeguard the tabletop by covering it with old newspapers or cardboard. Personally, I found that repurposing a cardboard piece from a pizza box worked wonders. It not only protected the surface but also provided a sturdy platform for moving the pot if needed.
Finally, make sure to have your paint, brushes and art supplies ready. Acrylic paint works great for terracotta pots due to its vibrant color options, suitability for decorative painting and quick drying time. Don’t forget the following:
- A small jar of water for rinsing paint brushes while working to prevent color mixing
- Paper towels for drying the paint brushes
- A palette for mixing colors or dispensing a small amount of paint
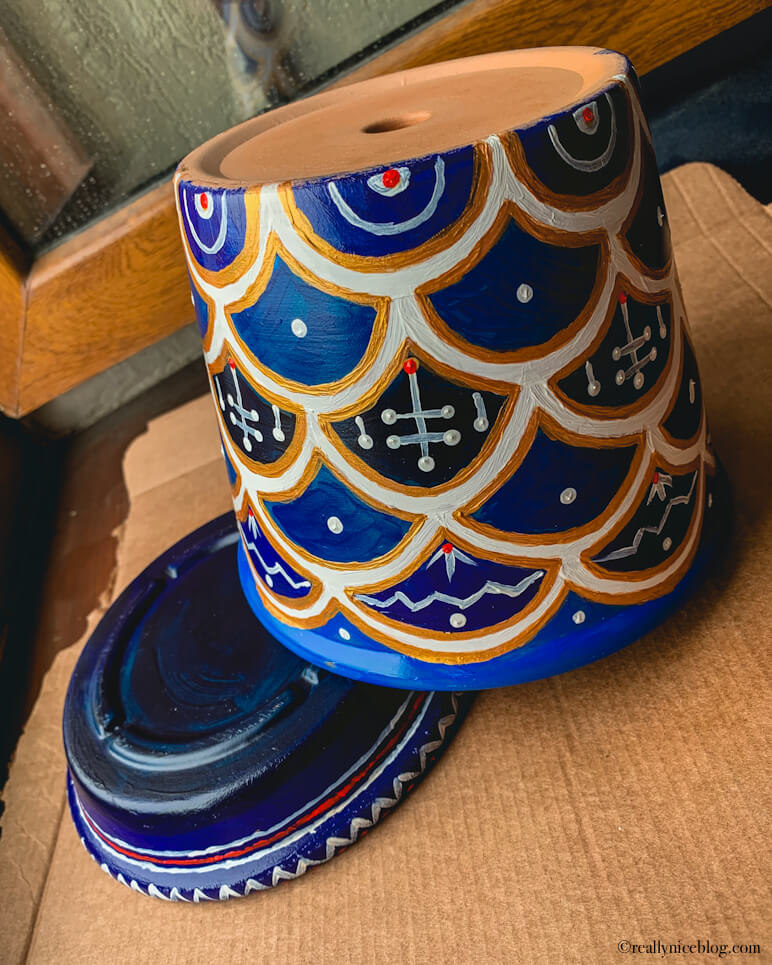
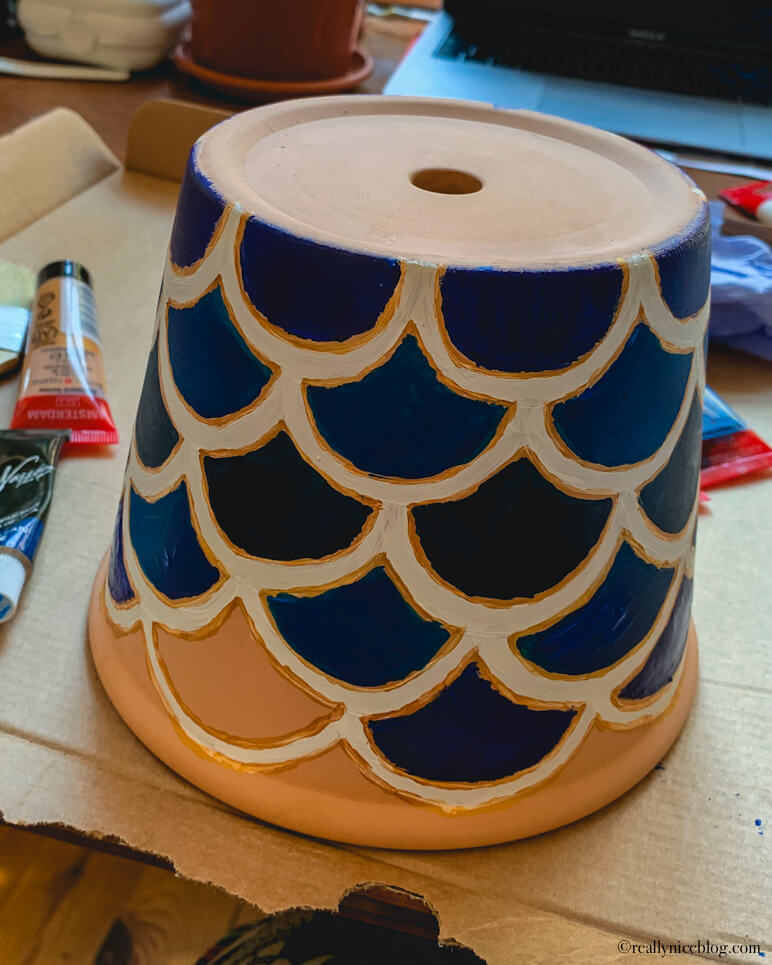
#4 Painting Terracotta Pots
The most enjoyable and creative step is here – painting your terracotta pots and saucers according to your designs. Or, letting your creativity flow through improvisation.
Begin by painting the entire pot and saucer with one or multiple colors as a background, then proceed to add details and patterns. Allow the acrylic paint to dry before applying another layer, typically taking around 20-30 minutes, depending on the thickness of the paint.
If you feel that you want to change something, simply paint it over. Most importantly, follow your heart and enjoy the painting process.
#5 Sealing Terracotta Pots
The final step involves sealing the painted terracotta pot, typically using a clay pot sealer or acrylic paint varnish. This not only gives it a polished look but also safeguards the paint coat.
Before proceeding to seal the terracotta pot, ensure that the paint has thoroughly dried. To achieve this, allow the pot to sit for a few days after completing the painting process. Then, apply a gloss varnish spray for acrylic paint to seal it. Acrylic paint varnish may offer UV protection, shielding the pot from any potential color changes when exposed to sunlight.
When sealing terracotta pots, it is crucial to carefully read the label and preferably perform the sealing process outside or in a well-ventilated area. Follow the instructions provided and apply additional coats if necessary. Allow the painted and sealed pots and saucers to dry for a few days. Congrats! You are now ready to plant charming houseplants in your one-of-a-kind, hand-painted terracotta pots.